Learn to Draw Black Snow
Black Snow is a lot of fun to draw because he has a very classic tough guy look that seems to come from some bygone era, while at the same time there is something kind of modern and edgy about him as well. Much of his mood is depicted in his body language, so before I start drawing I like to think about exactly what pose he is in and what feeling he is trying to convey.

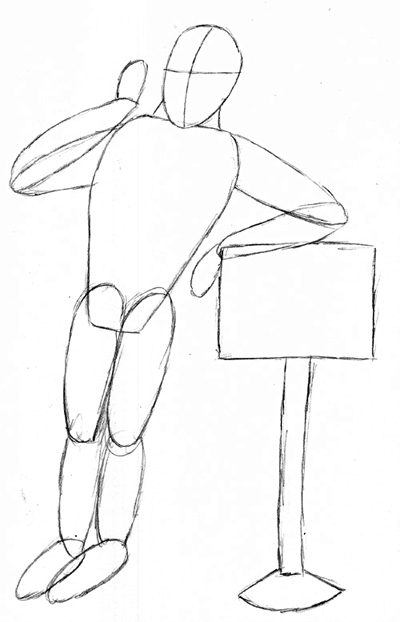
For this example I will have him doing a sort of too cool for school pose. Start out by drawing the outlines of the shapes that make up his body very lightly with your pencil. Normally I like to start out with the shape of the character’s head, but in this case I started with the shape of the sign since the way he leans will be directly related to this sign. Those cross-hairs on the head shape represent the spot directly between ol’ BS’s eyes, and allow you to easily see which way his head will be positioned when you add detail.
When outlining the body remember he is a muscular, barrel chested fellow who narrows at the waist. His arms should be long enough that his hands would lie just below his waist if they were at his sides. His head narrows at the jaw, but not as much as some characters because his jaw is extra wide and has a small cleft. His neck is extra wide and muscular, and his thighs narrow as you go towards the feet. You don’t need to be too careful in this step because these shapes are just there as rough guide lines for the rest of the drawing and will be erased or drawn over anyway.

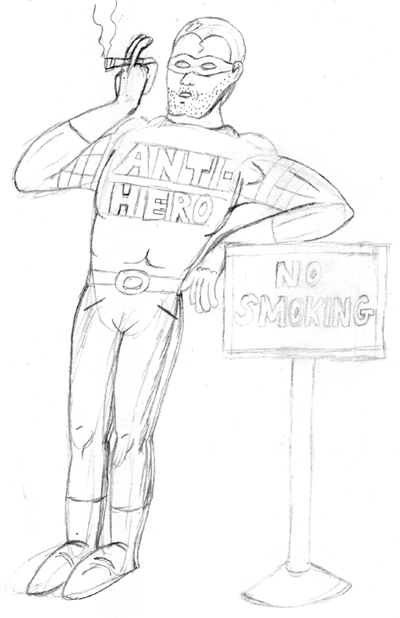
The next step is where you go over these shapes and start adding some detail by drawing slightly darker with your pencil. It should be dark enough to clearly make out, but not so dark it won’t come off if it needs to be erased. The larger the picture is generally the more detail I will include. This picture takes up the majority of an 8 and a half by 11 inch sheet of printer paper, so I can include a lot more detail than in a 2 inch by 2 inch panel.
When drawing the face I like to start off with the eyes since I already have that center line in place. I draw that mask around his eyes from one side until it hits the ear, then add his eye slits. From here I like to add his nose and mouth which fall on that center line, then outline the jaw. Next I do the hair line, which peaks at the center line, then add the curve of his head, and don’t forget his little skunk spot. Next I like to draw the outline of his shoulders and neck, followed by the rest of his torso. To put the famous anti-hero on the chest I draw lines to signify the tops and bottoms of all the letters to make sure they line up properly. When drawing his arms notice the curves of his muscles. The upper arms have two white stripes, and the gloves start about halfway up the lower arms. His waist expands right at the point where you draw his belt, and narrows until you hit the knees. The legs then expand again until you hit the ankles. His boots start about halfway up the lower legs. The feet are fairly simple, and have little detail to worry about. All the other details like muscle definition are usually added now to the legs, arms, chest, face, and where ever else you feel more detail is needed. The sign in this picture can be lettered the same way as BS’s chest. The only real detail added here was the frame to the sign’s border.

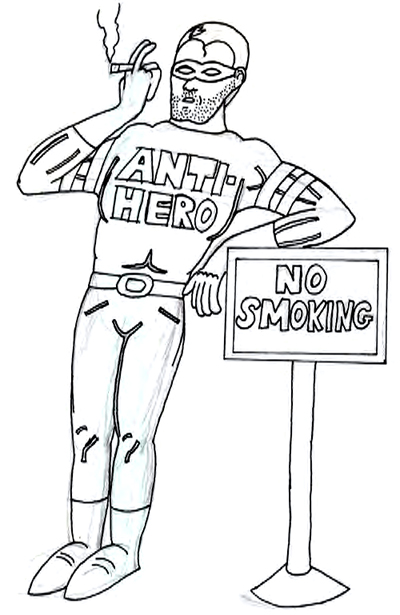
Now we use our pens to ink the outlines of some of our details from the last step. It is important to determine now what areas are going to be “colored” in and what areas are going to be left white. When you know an area is going to be black you can use that to your advantage by adding more black to narrow things that were originally made too wide, like the spot where the boots meet the pants, or outlining your letters. A good way to hide your mistakes.
To add the details like muscle definition to areas that you know are going to be black, you simply trace around the area where you sketched the detail in pencil instead of tracing directly over it. For making a white a line this would mean creating a very thin rectangle around the original pencil line. This technique is known as using the negative space, in case you wanted to sound smart and impress your peers. Once you color in these spots and erase the pencil these details will look really cool, like you drew them with a white pen. You’ll notice that I use this same technique when I have a black object touching another black object, for example BS’s arm and chest.

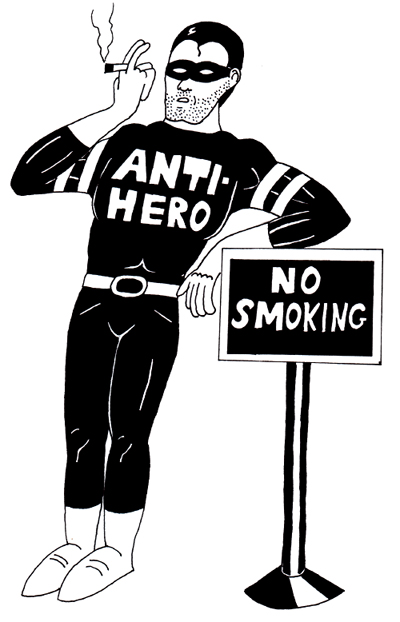
The last step is to fill in all the areas you want “colored.” I actually don’t usually do this step and the third step separately, but I thought it would be easier to explain and for someone just starting out. This step is one of the most time consuming for me because I do all my drawing with Pilot precise fine tip rollerball pens so I can get into all the small detailed areas. Drawing colored areas is nice because you can cover up all your many, many mistakes. If only it were that easy with all of my other mistakes in life. When deciding what to color with something like this sign, it is pretty much a matter of preference. If you want it to look real cool like this one then try to put as much, if not more, black as you do white in the picture.
Once you fill in all the colored areas you can go ahead and erase all your pecil marks. There you go. Unless I am mistaken you are now the proud holder of a splendid masterpiece starring everyone’s favorite anti-hero…Black Snow! Now get out there and draw all your heart’s desires.